Important: We assume that you are using Netbeans 5.5.1 (or later) with the Netbeans Mobility Pack.
It is really simple to configure Floggy within your environment. You can watch this video or read the steps bellow.
The 2 main steps are:
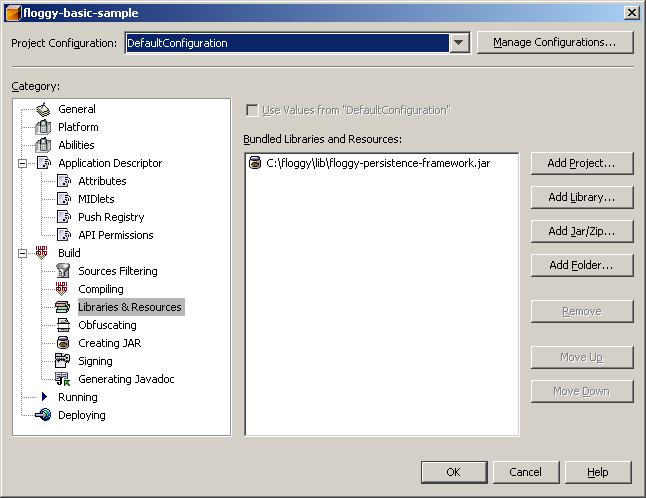
Open the project properties pane and add the framework jar to your classpath. Once you have completed this step, you will have a pane similar to this:

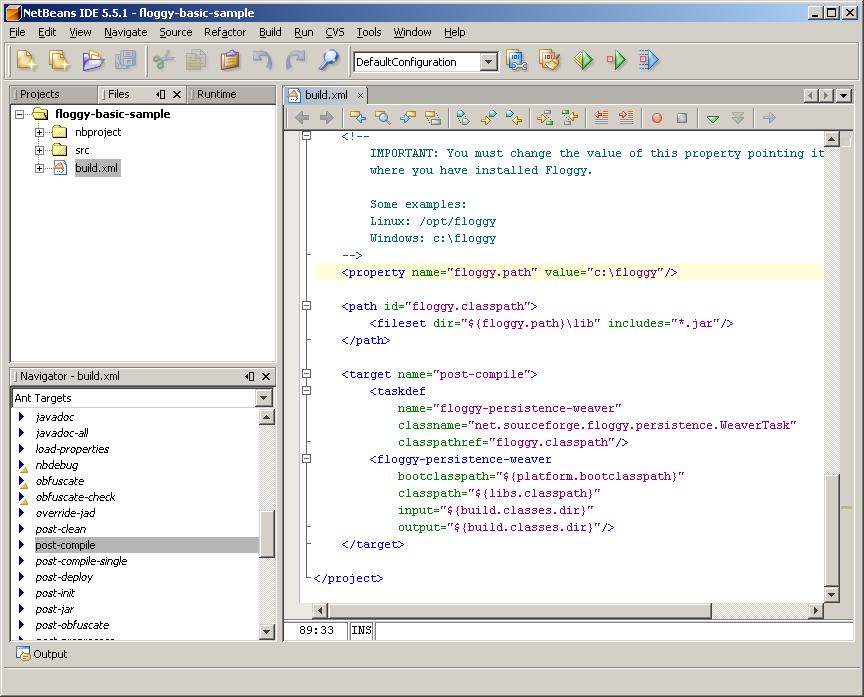
Then, attach the following lines into the build.xml and change the value of the "floggy.path" property, pointing it to the directory where you have installed Floggy in your computer. By default, the build.xml file is located under the project root directory. To find this file, use the Files window (in the latest Netbeans version you can open this window pressing Ctrl+2).
    <!--
        IMPORTANT: You must change the value of this property pointing it to the directory
        where you have installed Floggy.

        Some examples:
        Linux: /opt/floggy
        Windows: c:\floggy
    -->
    <property name="floggy.path" value="c:\floggy"/>

    <path id="floggy.classpath">
        <fileset dir="${floggy.path}\lib" includes="*.jar"/>
    </path>

    <target name="post-compile">
        <taskdef
            name="floggy-persistence-weaver"
            classname="net.sourceforge.floggy.persistence.WeaverTask"
            classpathref="floggy.classpath"/>
        <floggy-persistence-weaver
            bootclasspath="${platform.bootclasspath}"
            classpath="${libs.classpath}"
            input="${build.classes.dir}"
            output="${build.classes.dir}"/>
    </target>
Once you have completed this step, you will have a screen similar to this:

If you need, here is an example of a build.xml file configured to use Floggy.